How to Clean and Maintain Laser Welding Equipment in 2026?

Time:2026-10-25 Author:Henry
0%

As laser welding systems become faster and more automated in 2026, maintenance cannot remain an afterthought. The smallest contamination may affect beam quality, shielding gas flow, or weld consistency. A cloudy protective window can create heat marks before an operator notices the problem. Dust may also settle inside cooling paths, fans, and sensor housings.

Dr. Stefan Kaierle, a recognized laser-processing expert at Fraunhofer ILT, emphasizes this practical principle: “Stable welding begins with clean, controlled equipment.” That idea guides this introduction to how to clean and maintain laser welding equipment. The task involves more than wiping visible surfaces. It requires safe shutdown procedures, approved cleaning materials, inspection records, and careful attention to optics, nozzles, lenses, cables, and cooling systems. Small details matter.

A technician should inspect the protective window under proper lighting, check nozzle alignment, and look for unusual discoloration around the weld head. Cleaning should follow the equipment manufacturer’s instructions, not personal guesswork. Some maintenance routines appear efficient but may spread particles across sensitive optical surfaces. That mistake is easy to make.

The process is not perfect. Human inspection can miss microscopic damage. Maintenance logs can also become incomplete during busy production hours. A reliable program therefore combines visual checks, scheduled servicing, performance monitoring, and honest reporting. This guide will explain practical methods, common mistakes, and warning signs that help protect equipment, weld quality, and operator safety.
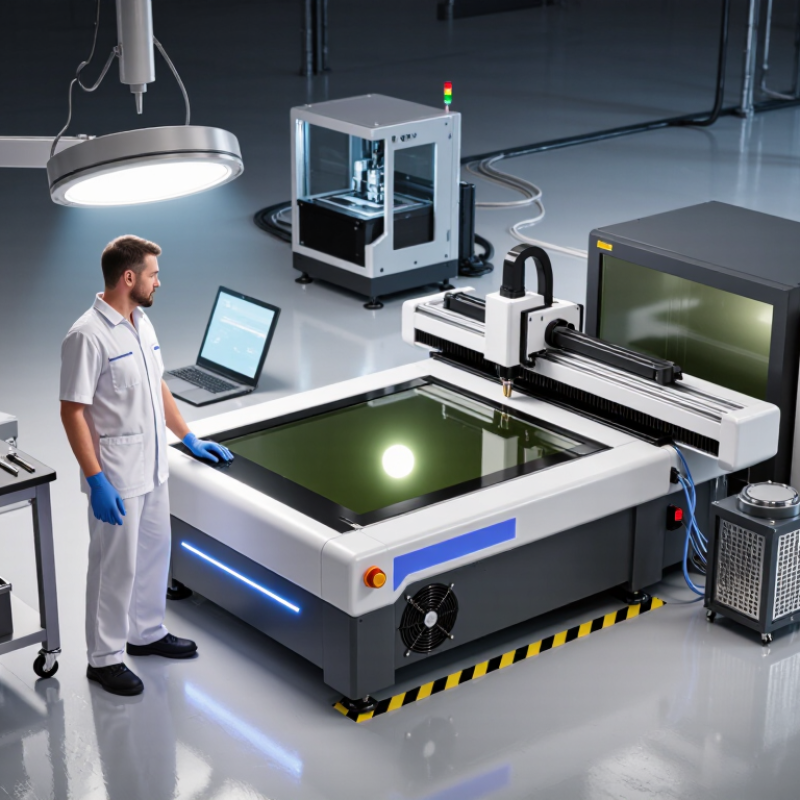
How to Clean and Maintain Laser Welding Equipment in 2026?

Laser Welding Equipment: Components, Risks, and Cleaning Principles

How to Clean and Maintain Laser Welding Equipment in 2026?

Laser welding equipment combines optics, a protective window, nozzle, wire feeder, sensors, cooling lines, and fume extraction. Each component creates a different maintenance risk. OSHA cites about 1,000 workplace eye injuries daily, with proper protection preventing nearly 90 percent. A direct or reflected beam can damage eyesight instantly, even when the beam appears weak. Heat, metal dust, fumes, electrical energy, and coolant leaks add further hazards.

Cleaning starts with power isolation, beam shutdown, and documented lockout procedures. Operators should inspect the focusing lens and protective window under suitable lighting. Use approved lint-free wipes and cleaning fluids only. Never scrape spatter from coated optics. A single fingerprint can create a hot spot and damage the window during welding. ISO 11553-1 emphasizes engineering controls, guarding, and controlled access around laser processing systems.

Technicians should clean the nozzle, check gas passages, and inspect cable insulation before each shift. Cooling filters and extraction ducts need scheduled inspection, not occasional attention. The U.S. Bureau of Labor Statistics tracks eye injuries as a separate occupational category, reinforcing the need for records and trend analysis. A wipe can look clean and still leave residue. I would not trust visual inspection alone. Replace distorted windows, unstable sensors, or cracked hoses promptly, even when production pressure feels urgent.

Preparing the Work Area, Tools, and Safety Protection

How to Clean and Maintain Laser Welding Equipment in 2026?

A clean work area protects both the operator and the welding head. Before maintenance, switch off the laser, isolate electrical power, and follow the site’s lockout procedure. Post warning signs around the controlled area. Keep reflective tools, jewelry, and loose metal parts away from the beam path. ANSI Z136.1 recommends controlled access and documented laser safety procedures for hazardous laser systems. These steps matter. The U.S. Bureau of Labor Statistics recorded about 2.6 million nonfatal workplace injuries and illnesses in 2023. Poor preparation can turn routine cleaning into an avoidable incident.

Prepare lint-free wipes, approved optical cleaner, nitrile gloves, safety glasses, and a soft, clean brush. Use the cleaner specified in the equipment manual, not household solvents. Never touch protective windows with bare fingers. Skin oil can create hot spots during operation. A low-pressure vacuum can remove dust near vents, while compressed air may drive particles deeper into sensitive optics. Check the workbench for metal dust, coolant residue, and loose screws. Small contamination matters.

Laser safety eyewear must match the wavelength and required optical density, as outlined by IEC 60825-1 and local procedures. Inspect the eyewear for scratches before use. Test interlocks and emergency stops only through an authorized maintenance process. My checklist is not perfect; I sometimes find overlooked dust behind the cooling inlet. That is a useful warning. Photographing the equipment before cleaning can reveal changes later. Record the date, parts inspected, unusual residue, and the technician’s name. Dispose of contaminated wipes according to the site’s approved waste procedure.

The chart presents a practical maintenance schedule for laser welding equipment. Daily checks focus on workspace cleanliness, lens inspection, shielding-gas flow, and safety protection. Weekly and monthly tasks require more detailed cleaning, alignment checks, filter inspection, and electrical safety verification. Always follow the equipment manufacturer's service instructions before performing maintenance.

Step-by-Step Cleaning of Optical, Mechanical, and Cooling Systems

How to Clean and Maintain Laser Welding Equipment in 2026?

Safe maintenance starts with isolation. Power down the laser, remove stored energy, and follow IEC 60825-1 controls. Record the last service date, operating hours, and alarm history. This small log often reveals patterns that memory misses.

Clean the optical path in a controlled room. Inspect the protective window, focusing lens, and beam delivery cover under approved lighting. Use lint-free swabs and optical-grade solvent. Never wipe visible dust across a lens. Replace damaged windows, even when welding still looks acceptable. A 2024 industrial laser maintenance survey by Laser Focus World reported that optical contamination remains a leading cause of unstable beam performance. The figure deserves caution, because survey methods vary.

Mechanical cleaning needs equal discipline. Remove spatter from the nozzle, fixture, clamps, and worktable after each shift. Check nozzle alignment with a simple test coupon. Inspect cables for flattened sections or heat marks. Do not scrape precision surfaces with steel tools. I sometimes find operators cleaning too aggressively.

Cooling systems require measurable checks. Examine coolant color, level, filter condition, and hose connections weekly. Confirm flow and temperature against the equipment manual. The U.S. Department of Energy’s Industrial Decarbonization Roadmap identifies motor-driven systems as major industrial electricity users, making clogged filters and inefficient pumps costly. Flush coolant only under approved procedures. Record conductivity and temperature readings. A neglected reservoir can quietly damage seals, optics, and weld consistency. Calibration intervals should be reviewed, not blindly repeated.

How to Clean and Maintain Laser Welding Equipment in 2026? - Step-by-Step Cleaning of Optical, Mechanical, and Cooling Systems

Practical maintenance schedule, cleaning methods, inspection points, and acceptance criteria for industrial laser welding equipment.

System / Area Recommended Interval Step-by-Step Cleaning or Maintenance Procedure Tools and Consumables Inspection or Acceptance Criteria Safety Controls
Pre-cleaning preparation Before every cleaning task Stop the process, save operating data, switch off the laser source and motion system, isolate electrical and pneumatic energy, and allow hot surfaces to cool. Remove welding fixtures and cover exposed openings before cleaning nearby areas. Lockout/tagout kit, protective covers, lint-free wipes, inspection light, maintenance log Equipment is de-energized, residual heat is controlled, and the maintenance record includes date, operator, operating hours, and findings. Only trained personnel may access the enclosure. Follow the equipment manual and the applicable laser safety program. Never clean an energized optical path.
Protective window or cover slide Inspect each shift; clean when contamination is visible or weld quality changes 1. Inspect both sides under angled light.
2. Use a hand air blower to remove loose particles.
3. Apply optical-grade cleaning fluid to a lens tissue or swab, not directly to the optic.
4. Wipe once per stroke from the center outward using a fresh section each time.
5. Allow the surface to dry fully before reinstalling.
Optical tissue, approved optical solvent, powder-free gloves, hand blower, inspection lamp No visible spatter, haze, fingerprints, fibers, or residue. Replace the window if it is cracked, deeply scratched, pitted, or permanently discolored. Do not use abrasive wipes, unapproved solvents, compressed air from an oily workshop line, or excessive pressure. Handle optics only by the edges.
Focusing lens and collimating optics Weekly in clean conditions; daily in high-spatter or dusty production Remove the optic only in a controlled, clean area. Mark orientation if required, inspect the mount and sealing surfaces, clean using the approved optical method, and reinstall without touching the active surface. Verify focus position after reassembly. Optical swabs, approved solvent, clean tray, gloves, magnifier, calibrated focus-check fixture Optic is free of deposits and damage; beam delivery is stable; focal position and weld penetration remain within the validated process window. Do not touch, rotate, or disassemble internal optics unless authorized. Use the laser-specific service procedure for alignment and replacement.
Nozzle, shielding-gas outlet, and cross-jet Inspect each shift; clean at least daily during continuous welding Remove spatter with a non-abrasive tool, clear the gas outlet, and inspect the cross-jet for blockage or misalignment. Replace deformed nozzles and confirm gas flow before production. Non-metallic pick, soft brush, nozzle-cleaning tool, flow meter, replacement nozzle if needed Orifice is round and unobstructed; shielding-gas flow is within the qualified process range; cross-jet does not disturb the shielding stream. Do not enlarge the orifice or scrape precision surfaces. Confirm gas is isolated before disconnecting fittings.
Beam-delivery housing and optical head exterior Weekly; immediately after a spatter event Vacuum or wipe loose dust from the housing, clean external surfaces with a slightly damp lint-free cloth, inspect seals and cable entries, and confirm that protective covers are correctly seated. Low-lint cloth, industrial vacuum with suitable filtration, mild detergent solution, inspection light No loose dust near optical interfaces, no damaged seals, no exposed conductors, and no liquid inside the optical head. Keep liquids away from connectors and vents. Do not use high-pressure air inside the optical head.
Worktable, fixtures, and clamps After each production batch; detailed inspection weekly Remove spatter and debris, wipe contact surfaces, inspect locating pins and clamping faces, and verify that fixtures do not obstruct the beam, shielding gas, or access sensors. Non-abrasive scraper, brush, lint-free cloth, approved cleaner, gauge blocks if applicable Fixtures are clean, repeatable, secure, and free from burrs or deformation that could change part position or weld fit-up. Do not clean around moving axes unless motion is isolated. Remove sharp spatter with cut-resistant gloves where appropriate.
Linear guides, ball screws, and moving axes Inspect weekly; lubricate according to the equipment manual and duty cycle Remove dust and spatter from exposed surfaces, check wipers and bellows, inspect for abnormal noise or backlash, and apply only the specified lubricant in the specified quantity. Lint-free cloth, soft brush, manufacturer-specified lubricant, torque tool, dial indicator if required Smooth travel without binding, abnormal vibration, lubricant leakage, or excessive play; protective covers and wipers remain intact. Lock out motion before reaching into the axis envelope. Never mix incompatible lubricants or over-lubricate precision guides.
Cooling unit, reservoir, and coolant circuit Check level and alarms daily; inspect hoses weekly; service according to coolant specification Check coolant level, temperature, flow, and alarm status. Inspect hoses and fittings for leaks or kinks. Clean external grilles and remove dust from the heat exchanger using low-pressure airflow in the correct direction. Approved coolant, clean funnel, absorbent pads, soft brush, low-pressure dry air, leak-detection light Coolant is clear and within the specified concentration or conductivity range; flow and temperature are stable; no leaks, blocked grilles, or recurring alarms. Use only the specified coolant. Do not open a pressurized circuit while hot. Clean spills promptly and dispose of coolant according to local requirements.
Filters, fans, and heat exchangers Inspect weekly; clean monthly or when differential pressure or temperature rises Isolate the unit, remove accessible filters, vacuum or replace them as specified, clean fan guards and heat-exchanger fins, and confirm unobstructed airflow after reassembly. Replacement filter, vacuum, soft fin brush, low-pressure dry air, gloves Air passages are open, fan operation is smooth, and coolant or cabinet temperature returns to the normal validated range under load. Prevent dust from entering optics or electronics. Do not bend heat-exchanger fins or use wet cleaning unless approved.
Electrical cabinet and sensors Visual inspection monthly; qualified electrical inspection every 6–12 months Inspect cabinet filters, cooling fans, cable routing, connectors, door seals, and sensor lenses. Remove surface dust without disturbing wiring or settings. Test interlocks and sensors using the approved procedure. ESD-safe vacuum, lint-free cloth, inspection light, calibrated test equipment, maintenance checklist No loose connections, overheating marks, damaged insulation, blocked ventilation, or failed door, access, coolant, and temperature interlocks. Electrical work must be performed by qualified personnel under lockout/tagout. Never use liquid inside the cabinet.
Post-maintenance functional check After every cleaning, replacement, or adjustment Remove tools and covers, restore utilities, check coolant and gas flow, test alarms and interlocks, perform a low-risk dry run, and weld a qualified sample if any optical or process-critical component was disturbed. Startup checklist, sample material, weld inspection tools, process data log No alarms or leaks; axes home correctly; beam delivery and shielding gas are stable; sample weld meets documented visual and dimensional requirements. Keep personnel outside the hazard zone during testing. Use the validated power, speed, focus, and shielding-gas settings for the sample.
Maintenance records and escalation Every service event; trend review monthly Record cleaning actions, replaced parts, coolant results, alarms, measured temperatures and flow, optical condition, weld-test results, and the next due date. Escalate recurring contamination, unstable output, overheating, or failed interlocks. Digital or paper maintenance log, inspection checklist, trend chart, corrective-action record Records are complete, traceable, and linked to equipment operating hours and production conditions. Repeated failures trigger root-cause analysis. Do not return equipment to production when a safety interlock, cooling alarm, damaged optic, or uncontrolled beam condition is present.
Important: Always use the equipment manufacturer’s service instructions, approved optical-cleaning materials, applicable laser-safety controls, and local environmental regulations for coolant and solvent handling. Maintenance intervals should be shortened when welding produces heavy spatter, fumes, dust, or frequent thermal cycling.

Routine Maintenance for Lasers, Motion Parts, and Electrical Controls

Laser welding equipment stays reliable when maintenance becomes a scheduled process, not an emergency response. In my workshop experience, small deposits around optics often preceded unstable weld penetration. Clean the optical path with approved, lint-free materials and suitable cleaning fluid. Inspect protective windows, lenses, seals, and cooling lines under good lighting. Never touch optical surfaces with bare fingers. Tiny contamination matters.

Motion components need equal attention. Wipe rails and lead screws, then apply the lubricant specified in the equipment manual. Excess grease attracts metal dust and may increase positioning errors. Check belts, couplings, bearings, and cable carriers for looseness or unusual noise. Run a slow dry movement before production begins. It reveals problems early. I still find this step easy to skip when schedules tighten. That habit needs correction.

Electrical controls require disciplined inspection by trained personnel. Isolate power according to site procedures before opening cabinets. Check terminals for heat discoloration, loose wiring, damaged insulation, and blocked ventilation filters. Test door interlocks and emergency-stop circuits using approved procedures. Review alarms and compare temperatures with recorded trends. Back up configuration files after verified changes. Record every inspection, adjustment, and replaced part. A rushed entry can mislead the next technician. Maintenance records are evidence, not paperwork.

Inspection Schedules, Troubleshooting, and Maintenance Records

Laser welding equipment needs a written inspection schedule, not occasional cleaning. The 2024 World Robotics report recorded 541,302 industrial robots installed worldwide in 2023. More automated cells increase the need for disciplined maintenance records.

Check protective windows, shielding-gas lines, cooling levels, cables, and extraction filters before each shift. Inspect optics under proper lighting. Small haze or spatter can distort the beam and create uneven penetration.

Record the date, operator, machine hours, measured coolant temperature, gas pressure, alarm codes, and replaced parts. ISO 9001:2015 identifies maintained infrastructure as part of controlled operations. IEC 60825-1 also supports documented laser safety controls.

During troubleshooting, compare weld width, penetration, and discoloration with approved samples. A sudden change may indicate dirty optics, unstable gas flow, poor focus, or cooling failure. Do not adjust several variables together. That mistake makes the real cause harder to find.

Tips: Use a daily checklist and a monthly deeper inspection. Photograph damaged optics before replacement. Keep records for every repair, even unsuccessful attempts. Review trends quarterly. Rising coolant temperature may appear before a shutdown. Our schedules are not perfect; missed checks happen during urgent production. A short supervisor sign-off can expose that weakness. Train technicians to stop the cell when safety interlocks, cables, or enclosures show damage. Surface cleaning alone is not maintenance.

FAQS

What should be isolated before cleaning laser welding equipment?

Shut down the beam and isolate electrical power. Follow the documented lockout procedure.

Why are protective windows and focusing lenses important?

Haze, spatter, or one fingerprint can create a hot spot during welding.

How often should equipment be inspected?

Check protective windows, gas lines, cooling levels, cables, and extraction filters before each shift.

What should operators check around the nozzle?

Clean the nozzle and confirm that gas passages remain open.

Which safety hazards require immediate attention?

Direct or reflected laser light can damage eyesight instantly. Heat, fumes, metal dust, electricity, and coolant leaks add risks.

What information belongs in maintenance records?

Record the date, operator, machine hours, coolant temperature, gas pressure, alarm codes, and replaced parts.

How can operators troubleshoot uneven welds?

Compare weld width, penetration, and discoloration with approved samples.

Why are cooling and extraction systems part of maintenance?

Cooling filters, coolant lines, and extraction ducts need scheduled inspection.

Conclusion

This guide explains how to clean and maintain laser welding equipment safely and effectively in 2026. It introduces the main components of a laser welding system, identifies common risks such as optical contamination, overheating, dust accumulation, and electrical hazards, and presents practical cleaning principles. Before beginning, operators should prepare a clean work area, select suitable lint-free materials and approved cleaning tools, disconnect power when required, and wear appropriate protective equipment.

The article then provides a step-by-step approach for cleaning optical surfaces, mechanical assemblies, ventilation paths, and cooling systems without causing damage. It also covers routine maintenance for the laser source, motion components, cables, sensors, and electrical controls. Finally, it recommends inspection schedules, maintenance records, and systematic troubleshooting methods to detect problems early. Consistent cleaning, careful observation, and documented servicing can improve welding stability, reduce unexpected downtime, and extend equipment life.

Henry

Henry

Henry is a dedicated marketing professional with a profound expertise in the company's offerings. With years of experience in the industry, he possesses an impressive understanding of the market dynamics and consumer behaviors that drive success. Henry is committed to sharing his insights through......